STEP ONE: Login to your account.

- On the home screen, click on “Sign-in” above the navigation menu.
- Enter your USERNAME and PASSWORD to login. You will see your Account Profile page.
STEP 2: Go to your Business Partner Dashboard
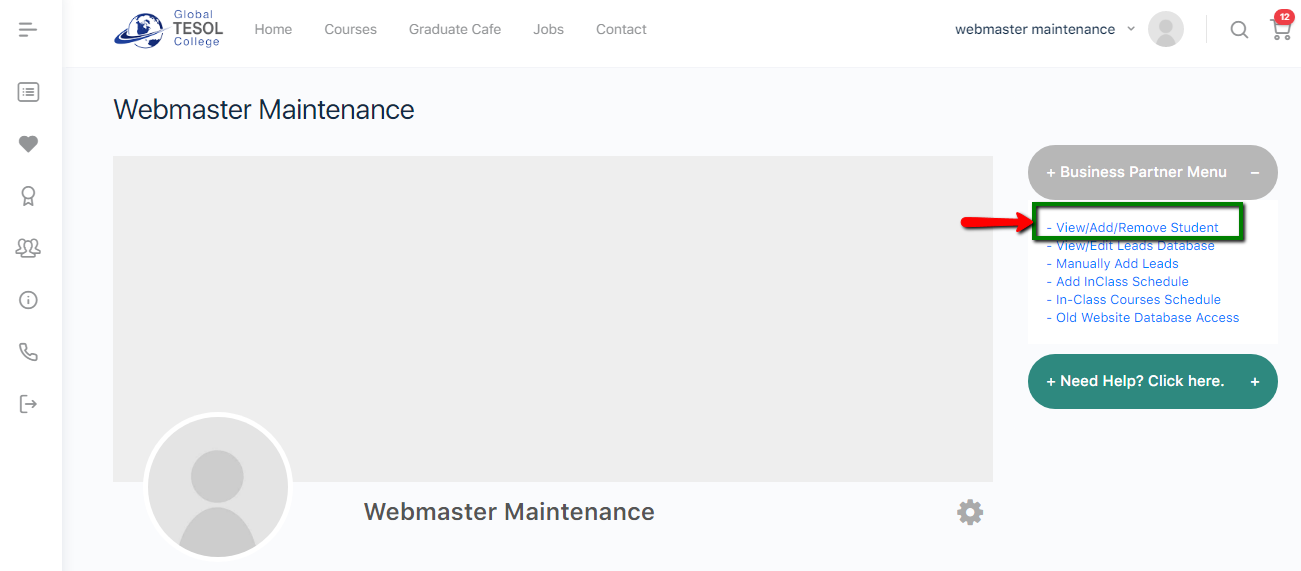
- Click “Business Partner Menu”.
- Click “View/Add/Remove Student“.
STEP 3: Select the course where you want to add or remove the student.
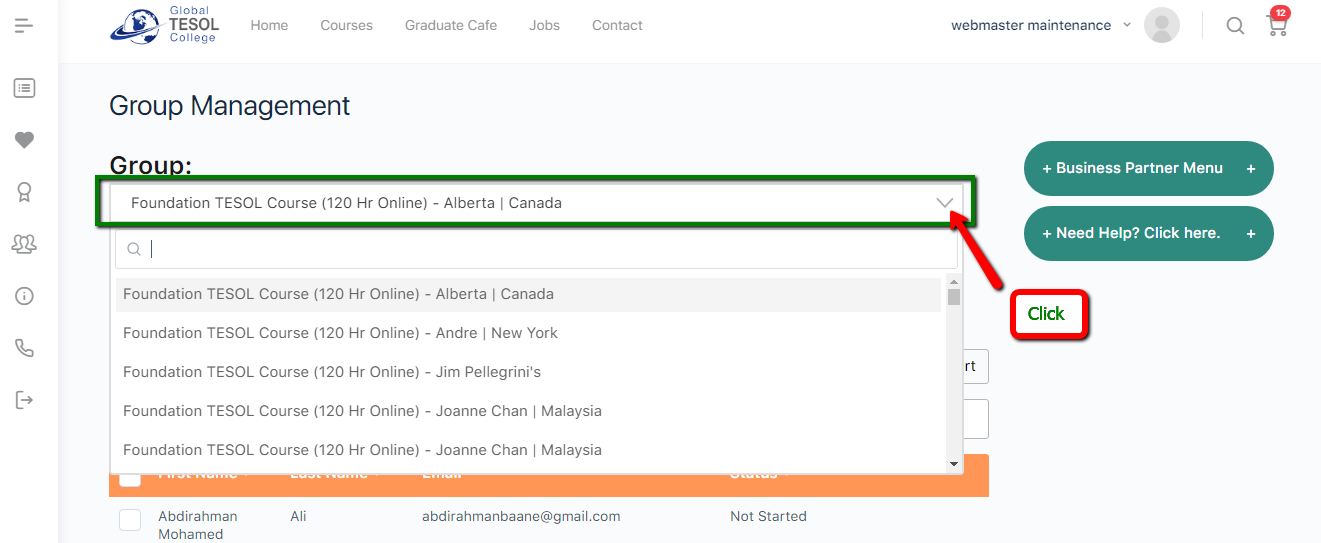
- Click the DROP-DOWN BOX beside GROUP. It will give you a list of groups/courses that you manage.
- Select the group/course that you want to add or remove a student from.
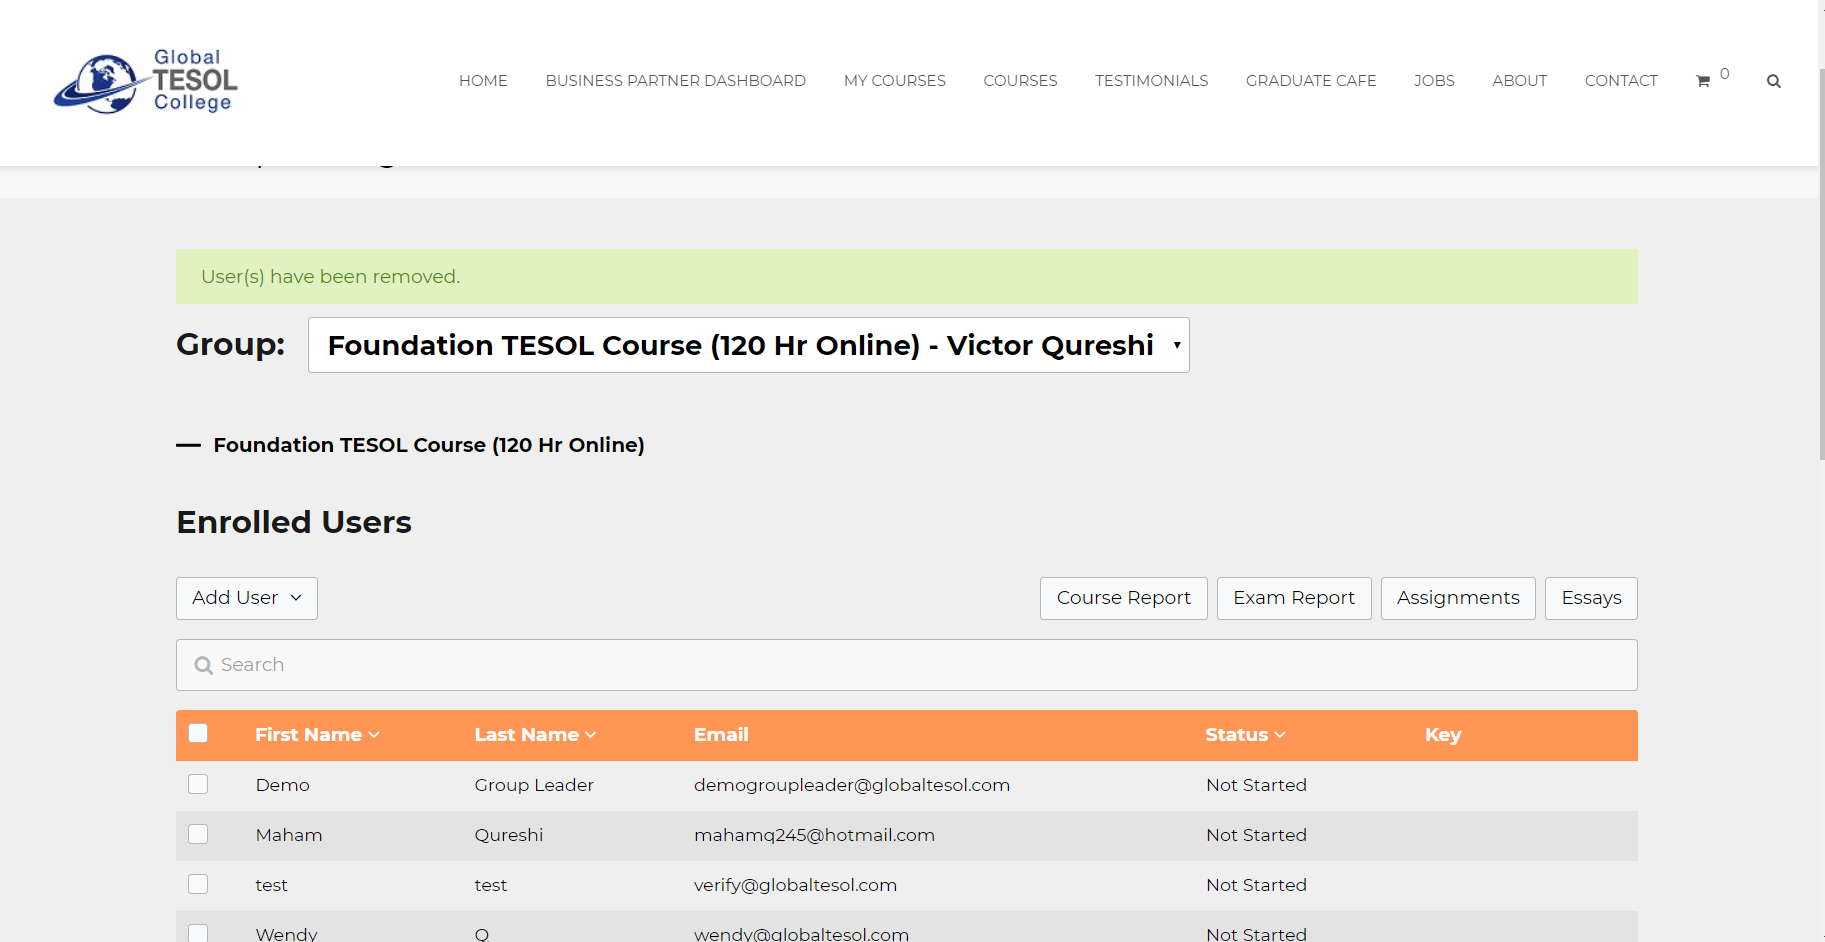
STEP 4: Remove or Add Student
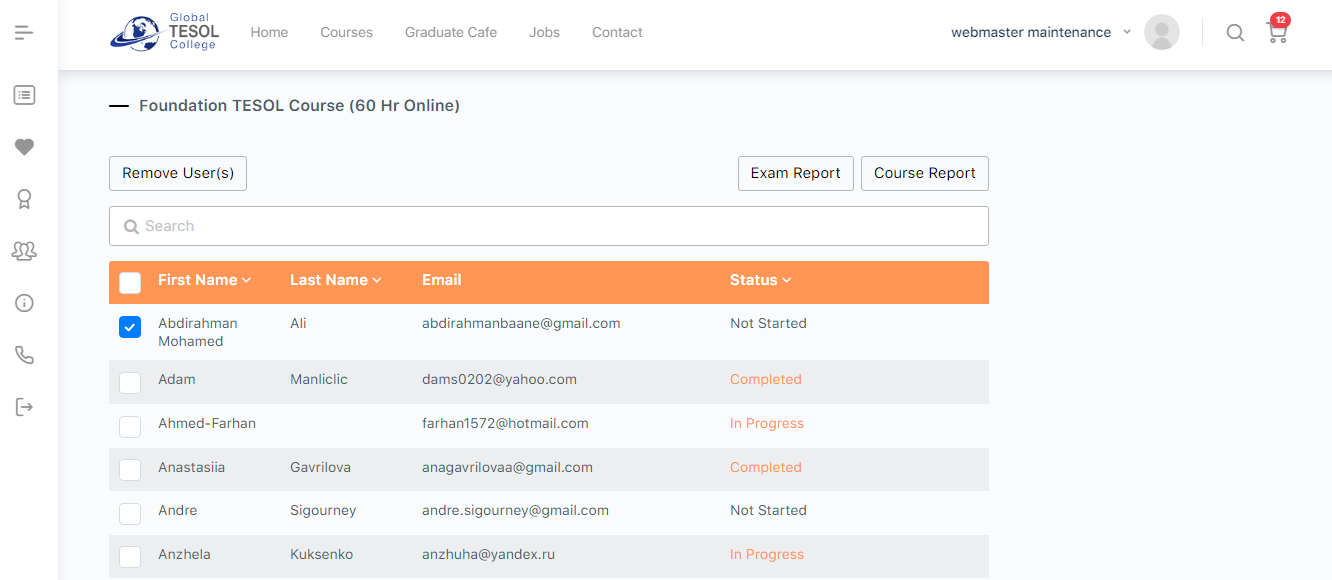
- To REMOVE a student from a course:
- Click on the CHECK BOX beside the name of the student that you want to remove.
- Click the REMOVE USER(S) button above the list.
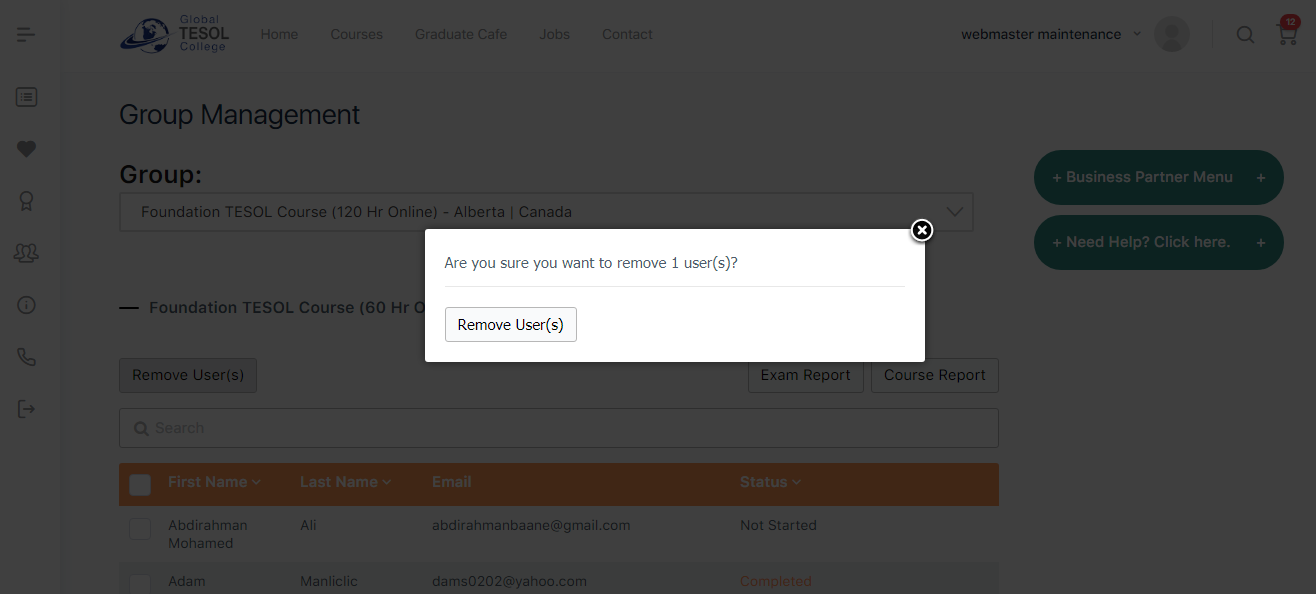
- You will get a pop-up notification saying, “Are you sure you want to remove 1 user(s)?”
- Click REMOVE USER(S) to remove the student from the list.
- You will see a GREEN NOTIFICATION BAR saying that the User(s) has been removed.
 To ADD or REGISTER as student:
-
- Select the Course group you want to add the student into.
2. Click on the ADD USER(s) button above the search bar.

3. Select ONE USER or MULTIPLE USER from the drop-down menu.
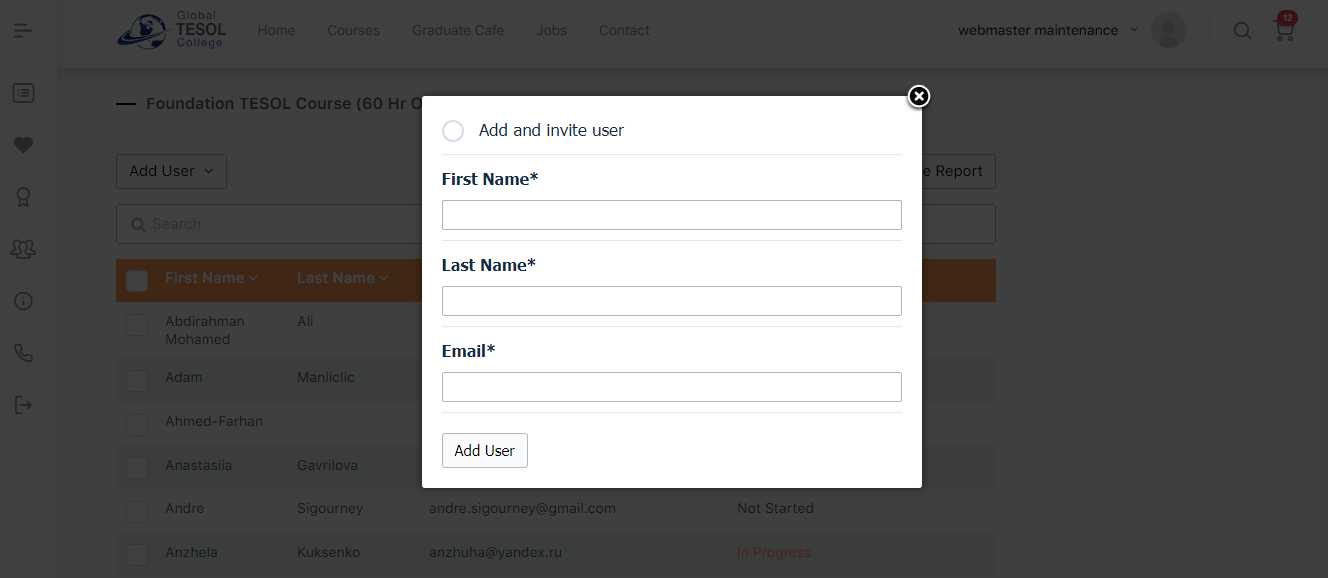
4. Enter student details (First Name, Last Name and Email Address). Make sure to select “Add and invite user” radio button.
5. Click ADD USER.

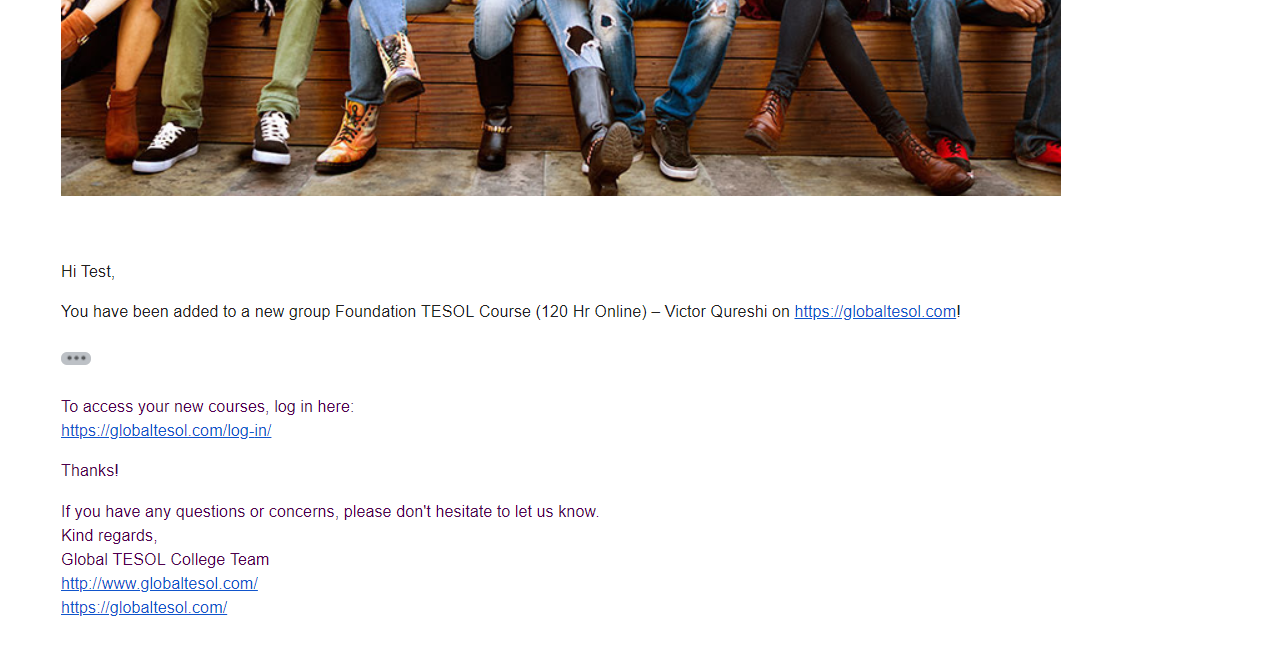 NOTE: The student will receive an notification email that he/she has been registered to the course. If the student is already registered in another course, he/she will not receive a password in the email. However, if the student is new, he/she will receive a temporary password to login to his account.